You can easily do a gelcoat repair yourself thanks to my advice below
Do you own a fiberglass boat? Sooner or later you will end up having a gelcoat repair to do.
It could be a failed maneuver, a heavy object dropped on the deck, or a hole drilled in the wrong place. You can usually repair them yourself.
It takes a little patience, but do it right and you won't see any difference.
Complications occur when there is damage on a difficult surface like the non-skid diamond deck or a curve.
Also, deep damage may require structural fiberglass or infill work before repairing the gelcoat.
Tools and supplies needed for a gelcoat repair :


Acetone


Advice :
You will need to fill in deep messes with filler putty before applying the finish.
Epoxy sealants adhere better than polyester products but are more expensive and require several additional steps before applying the finish color either gelcoat or paint.
Epoxy putty is best suited for repairs below the waterline.
1. Gelcoat repair: Match the color
For current boats, your dealer may be able to supply the corresponding gelcoat. But due to the weathering of your boat, it may not match.
There are kits from companies such as Evercoat with pigments to add to the resin and match the color.
2. Clean the edges

Use a small precision sander to smooth the edges to a 45-degree bevel and remove any loose material.
Use a fine router bit to carefully sand the perimeter of the area to be repaired. Remove any residue and clean with acetone.
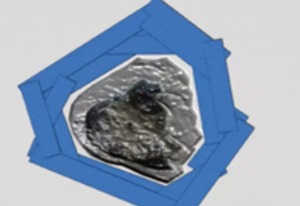
3. Hide the area
Carefully mask around the gelcoat repair area with thin painter's tape such as 3M Blue Tape.
Keep an unmasked margin of 2-3 mm around the area. In addition, mask adjacent areas or objects to protect them against inadvertently applied gelcoat (a stantion, a winch, etc.).
Clean the repair area again with acetone.
4. Mix the Gelcoat
After adjusting the color to the amount of gelcoat needed for the repair, add catalyst (hardener).
Different gelcoat resins require different catalysts, so be sure to use the correct formula, as well as the correct two-part ratio (for example, four drops of catalyst per teaspoon of resin).
Mix the two parts thoroughly to make sure everything hardens at the same time.
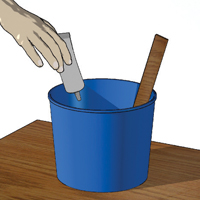
5. Apply the Gelcoat
Use a small stainless steel or plastic spatula to gently spread the gelcoat over the repair.
You should have about 10 to 15 minutes of working time after adding the catalyst before it starts to harden and is no longer fluid.
Fill the repair slightly higher than the surrounding area to allow sanding.

6. Sanding
Begin by sanding the cured gelcoat repair with 320 grit wet / dry sandpaper on a soft sanding block.
Widen area only to minimum, confine work to immediate repair area, continue sanding with 600 grit water sandpaper until you are almost level with surrounding gelcoat.
Finish the wet sanding with 1000 grit sandpaper. Then polish the area with a heavy polish paste and finish with buffing wax.
Hope this article helps you get started if you feel like doing it yourself. It is not very complicated in itself but there are a lot of steps.
If I can give you some advice : wait until you have several repairs to do if possible. You will save time ....